
Moving files to and from Jupyter and your local computer
This post describes three ways to move files between your local computer and Jupyter.
- The easy way - through the Jupyter web interface.
- In the terminal using scp.
- Using a client application, with WinSCP as an example.
Method 1: The easy way
The easiest way to upload or download data is through the Jupyter interface.
Classic Jupyter Interface - Upload file
From the Jupyer directory, navigate to where you want the file, then click the Upload button.
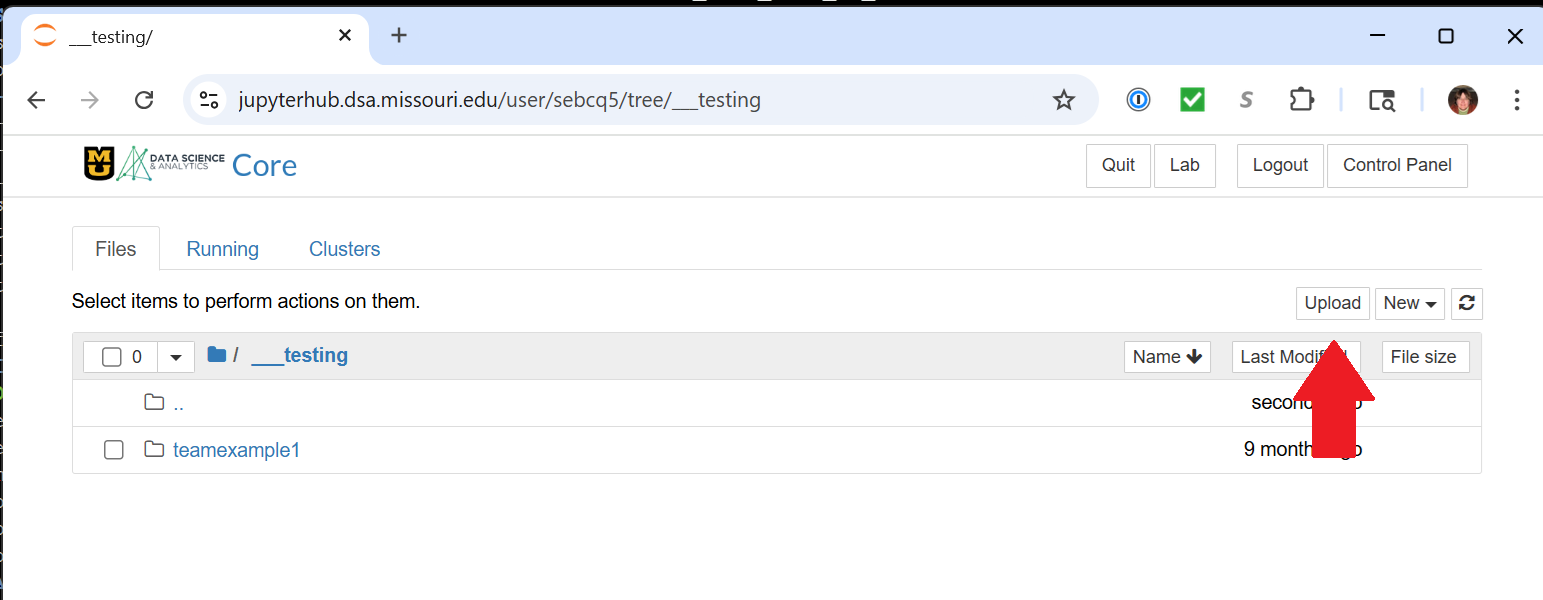
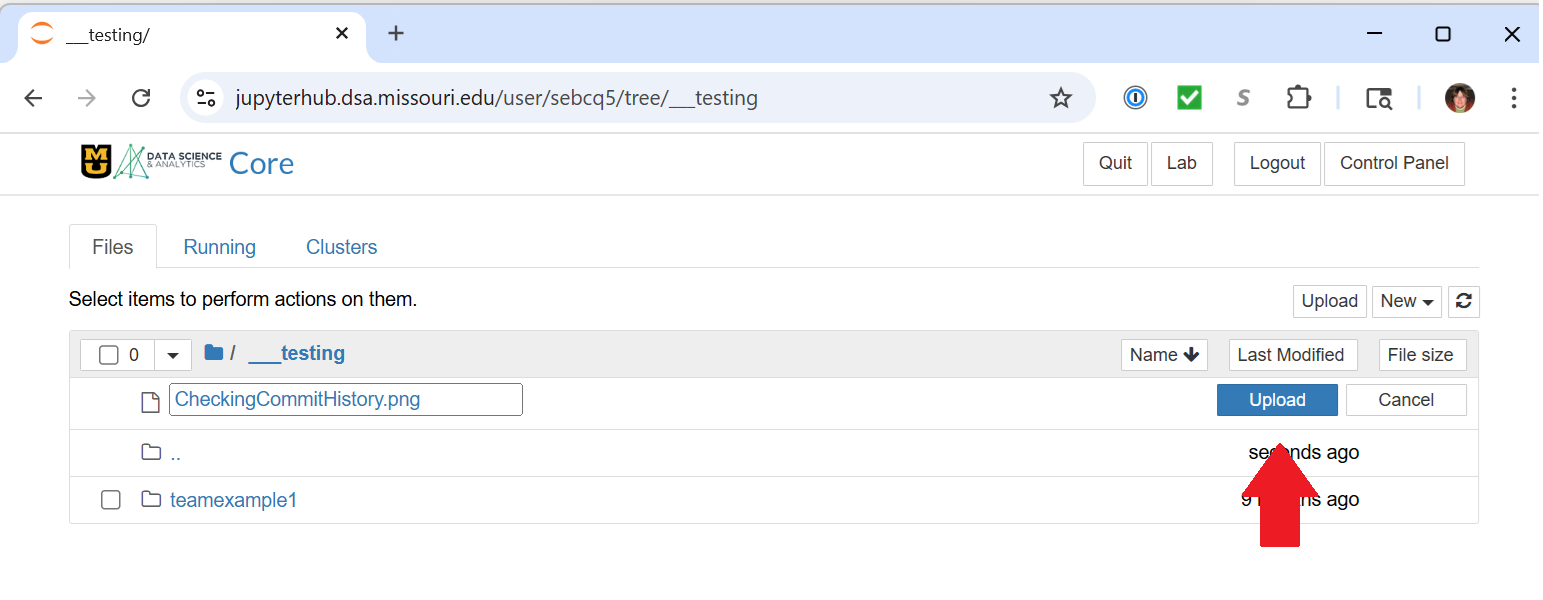
In the file directory window that opens, navigate to the file you want to upload and click open. The file will appear in your Jupyter directory with an Upload button next to it. Click that and it will be uploaded.
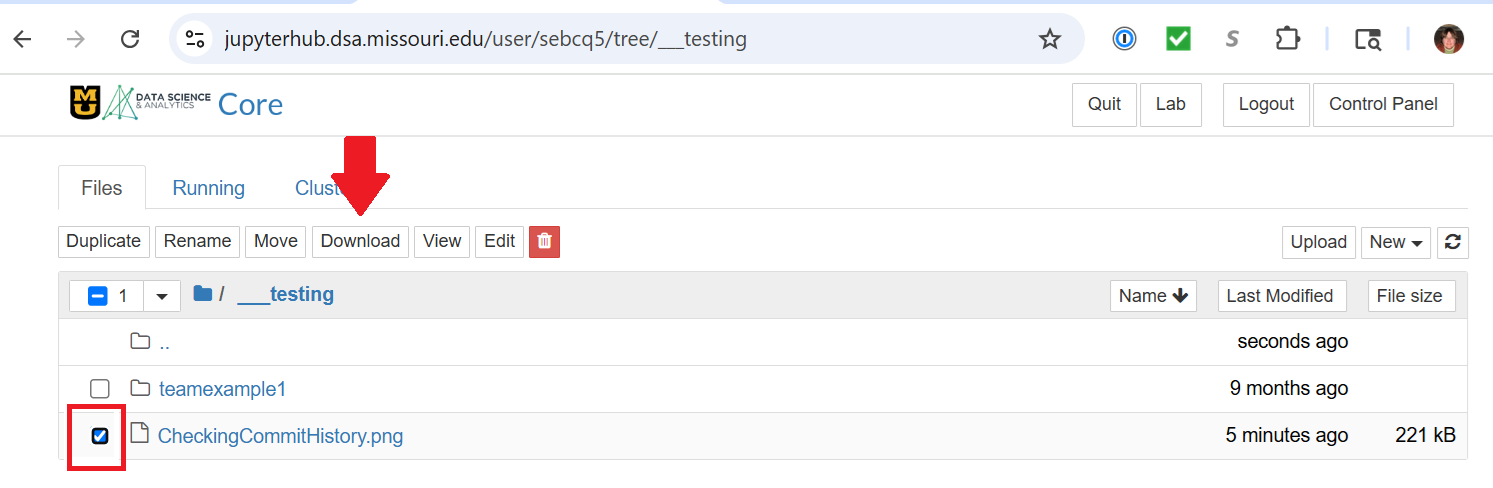
Classic Jupyter Interface - Download file
In the Jupyter directory, check the box next to the file and then click the Download button, which will appear when you check the box. In the pop-up, navigate to the location on your local computer where you want the file and click Save.
JupyterLab Interface - Upload file
From the Jupyer directory, navigate to where you want the file, then click the Upload icon, which is an up arrow.
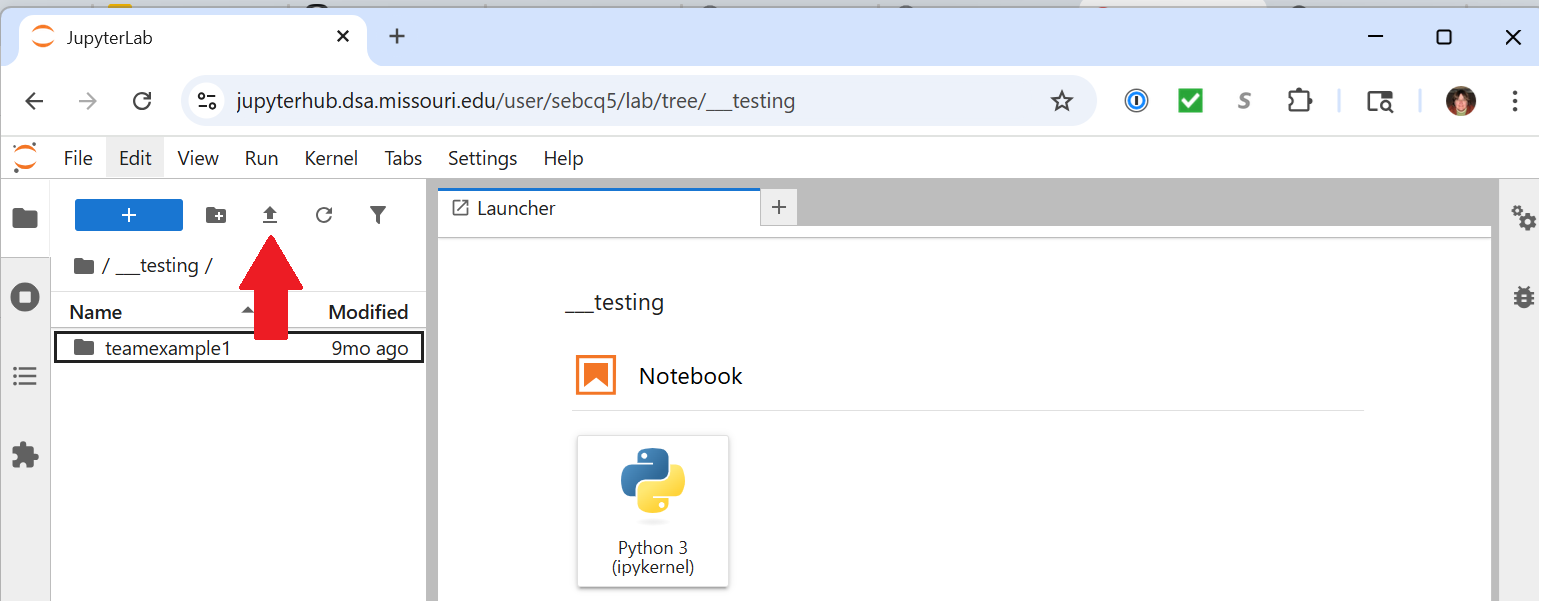
In the file directory window that opens, navigate to the file you want to upload and click open. The file will automatically be uploaded.
JupyterLab Interface - Download file
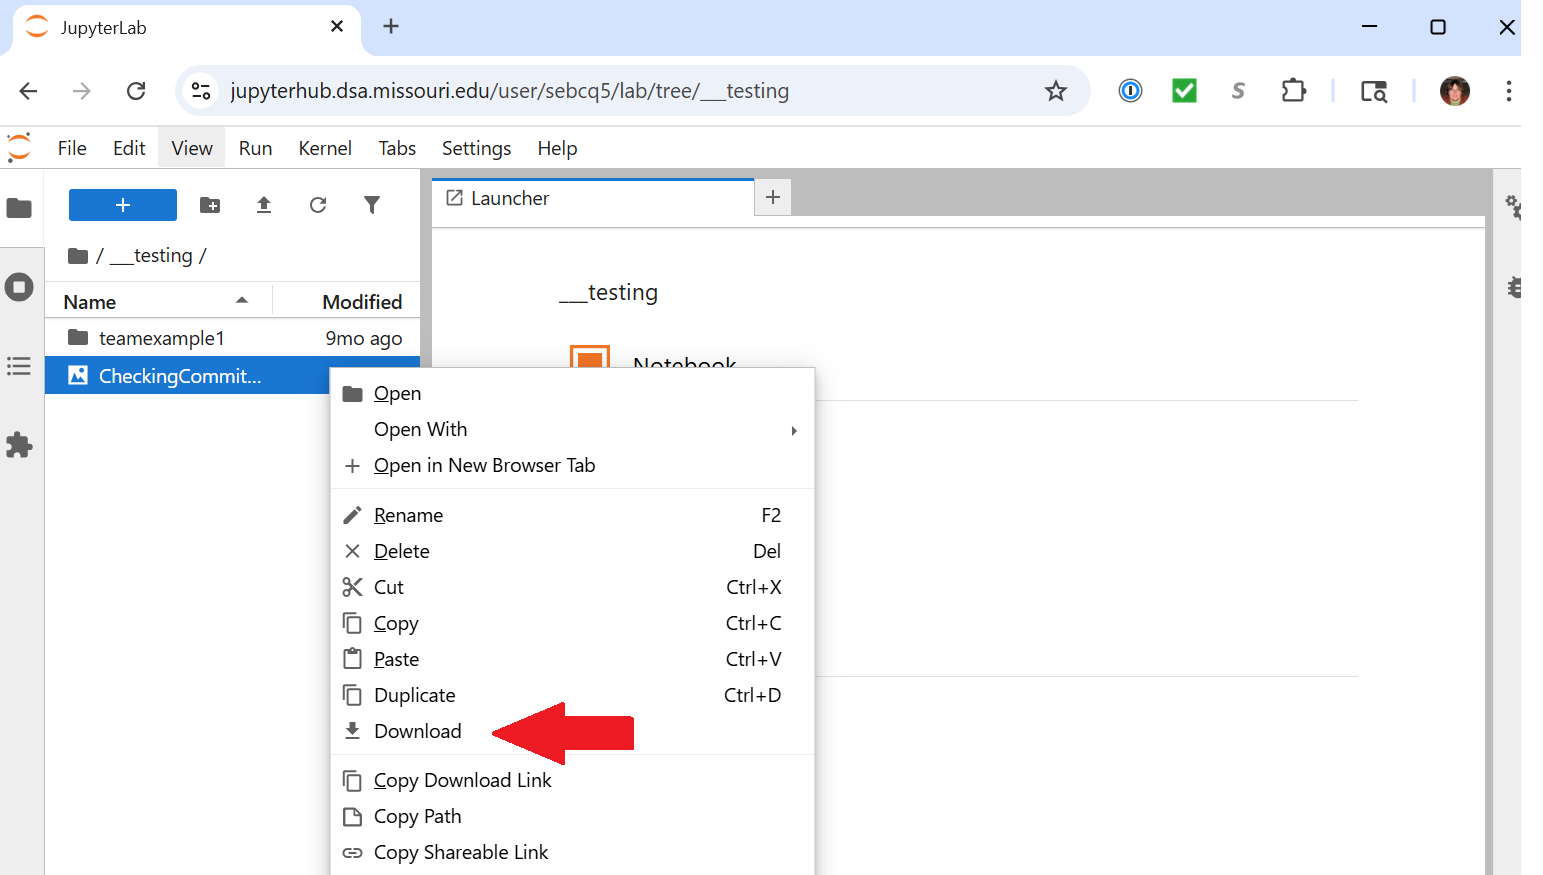
From the Jupyter directory, highlight the file you want to download. Right-click for the context menu and select Download. In the pop-up, navigate to the location on your local computer where you want the file and click Save.
Method 2: Terminal Commands
You can move files to and from your local computer to your Jupyter directory using lz.dsa.missouri.edu, a secure jump server.
- Make sure you are on the campus network or using VPN. Instructions for the VPN are here: https://wiki.dsa.missouri.edu/installing-the-university-anyconnect-vpn/
- Open a command window or Powershell on your local computer.
- Below we give examples of how to transfer files to and from your local computer and your Jupyter directory. You will be prompted for your university password when executing these commands. Note: as you type or paste your password, it will not be displayed for security reasons. Press enter after you are done typing.
To transfer files TO Jupyter
Navigate to the parent directory of the folder or file you want to transfer then execute this command. The command should be typed on one line and with the userid and paths changed as appropriate.
scp -r  local_folder_or_file_name
yoursso@lz.dsa.missouri.edu:jupyter/destination_path
To transfer files FROM Jupyter
Navigate to the parent directory of the folder on your local computer you want to transfer into then execute this command. The command should be typed on one line and with the userid and paths changed as appropriate.
scp -r yoursso@lz.dsa.missouri.edu:jupyter/folder_or_file_name local_folderMethod 3: Client Application
There are various client applications to assist with file transfers using the above protocols. I will provide an example using the Winscp client on a Windows machine, which is what I personally use.
- Download and install Winscp: https://winscp.net/eng/index.php
- Make sure you are on the campus network or using VPN for this step.
- In Winscp, set up a session using the New Site option for the lz.dsa.missouri.edu server using the sftp protocol, port 22, and your university single sign-on (userid) and your university password and save it for future use giving the session a name of your choosing. Highlight that named session and click the login button to connect using that session.
- In the left-hand panel, navigate to the folder location on your machine where the file or directory you wish to move is located.
- In the right-hand panel, there is a drop down box above the visible folders and files that lets you easily navigate to the correct folder. Navigate to root/dsa/home/userid/jupyter/path/to/where/you/want/the/file
- You can drag and drop the data file or folder from left to right.
Need more information or help? Reach out to us at 📧 jcwdw@missouri.edu